




10 Tips for Buying the Best Laser Thermometer?
Choosing the right Laser Thermometer can seem simple. Readings may change across a metal pipe, a freezer door, or a sunlit wall. An infrared device does not measure temperature by magic; it interprets emitted energy from a surface. That distinction matters when gloss, steam, distance, or reflected light affects the display. A useful purchase therefore requires more than a bright screen and a low price. This guide uses practical measurement principles, manufacturer specifications, and routine verification habits. It focuses on decisions that support accurate, repeatable results in kitchens, workshops, laboratories, and home maintenance.
The ten tips examine emissivity adjustment, distance-to-spot ratio, response speed, temperature range, display clarity, and durability. They also consider calibration records, battery behavior, grip comfort, and warranty support. A small detail matters. A narrow measurement spot may prevent a hot bolt from being averaged with cooler surrounding metal. Similarly, a unit rated for high temperatures may still struggle on polished stainless steel. Real experience is useful here, but it is not infallible. Even careful users can trust a stable-looking number too quickly. Comparing readings with a contact thermometer, when appropriate, can expose hidden errors.
The best choice depends on the surface, environment, and required tolerance. A homeowner checking an oven seal needs different features from a technician inspecting electrical panels. Before buying, readers should define their measuring range and acceptable uncertainty. They should also check independent testing, clear manuals, and service availability. Marketing claims deserve scrutiny. No instrument replaces sound procedure. This introduction leads into ten practical tips for selecting a Laser Thermometer with confidence. Careful judgment still matters.
What a Laser Thermometer Measures and How It Works
10 Tips for Buying the Best Laser Thermometer
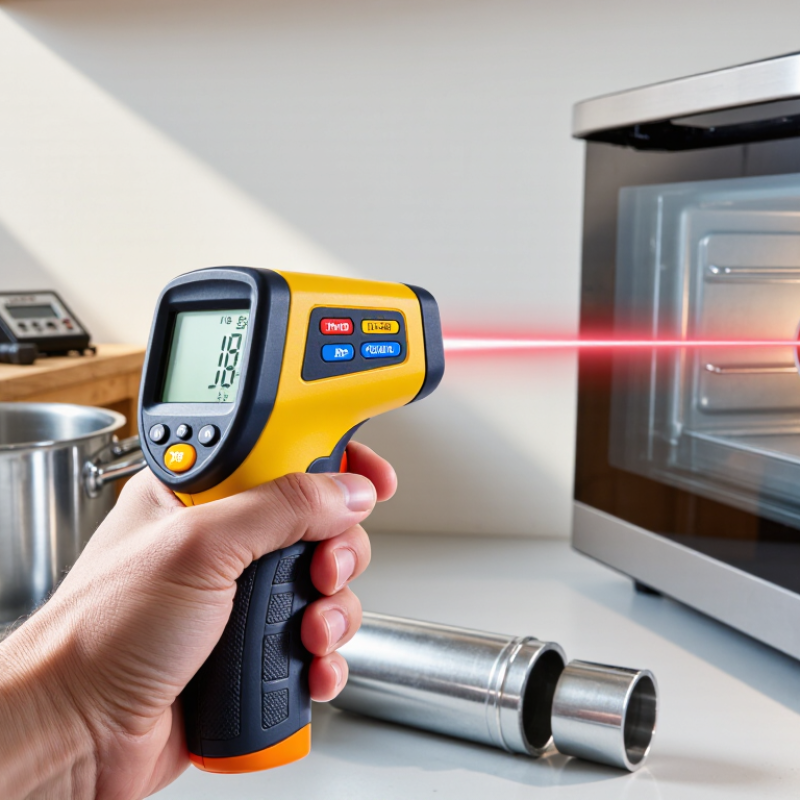
A laser thermometer, more accurately called an infrared thermometer, measures surface temperature without physical contact. It detects infrared energy naturally emitted by objects and converts that energy into a temperature reading. The visible laser only helps aim the sensor. It does not perform the measurement. Aim at a specific spot, press the trigger, and read the display within seconds. Simple in use.
The visible laser only helps aim the sensor. It does not perform the measurement.
Accuracy depends on more than the device itself. Every surface has an emissivity value, which describes how efficiently it releases infrared energy. Matte, dark surfaces usually provide more reliable readings than polished metal. Shiny materials can reflect nearby heat, such as sunlight or a hot pipe.
Steam, dust, and glass may also distort results. It measures surfaces, not the air behind them. In practical checks, I compare readings with a contact thermometer when the result seems unusual. That extra step can reveal a mistake.
When choosing a model, check its distance-to-spot ratio. A narrow measurement area helps when inspecting wires, small vents, or individual machine parts. Adjustable emissivity is useful for mixed materials. Look for a clear display, quick response, stable readings, and stated accuracy across the intended temperature range.
A calibration record adds confidence, but it does not remove every limitation.
I still question readings taken from reflective steel. That doubt is useful. Good measurement requires suitable technique, not just a sophisticated instrument.
Key Accuracy Factors to Check Before Buying
10 Tips for Buying the Best Laser Thermometer?
Key Accuracy Factors to Check Before Buying
Accuracy begins with the target, not the display. Before buying, check the thermometer’s stated accuracy range and measurement resolution. A reading may look precise while still carrying a wide error margin. Small details matter.
Emissivity is critical when measuring painted metal, polished surfaces, plastic, or food. Choose a model with adjustable emissivity, or verify that its preset value matches your material. The distance-to-spot ratio also matters. A 12:1 ratio means the sensor reads a 1-inch area from 12 inches away. If the target is smaller, surrounding surfaces can distort the result. Test the same surface from different distances. Repeat the test.
Response time affects moving targets, hot pipes, and changing equipment. A slow sensor may record yesterday’s heat instead of the current temperature. Check the operating range, especially if you work near freezers, ovens, engines, or outdoor machinery. Environmental conditions can affect results too. Steam, dust, reflective surfaces, and strong sunlight deserve attention. A practical comparison with a calibrated contact thermometer can reveal unexpected differences. That check is not perfect, but it is useful.
Look for calibration information, traceable test documentation, and clear instructions. Reliable manufacturers explain uncertainty instead of hiding it behind impressive digits. Consider repeatability as well as one-time accuracy. If five readings vary widely, the device may not support confident decisions. I would also inspect battery stability and trigger comfort, because poor handling can create avoidable errors. Even experienced users occasionally measure the wrong spot. A clear laser guide helps, but it cannot replace careful positioning.
Choosing the Right Temperature Range and Distance Ratio
When buying a laser thermometer, choose a temperature range that matches the job, not one that simply looks impressive. A kitchen surface may need 0–300°C, while engine parts or electrical panels may require a wider span. Check the accuracy across the range. Some devices become less reliable near their limits. That matters.
The distance-to-spot ratio shows how far you can stand from the target. A 12:1 ratio measures a 2.5-centimeter spot from 30 centimeters away. The laser marks the center, but it does not define the entire measuring area. This is an easy mistake. If the target is smaller than the spot, nearby surfaces can affect the reading. For a narrow pipe, connector, or circuit terminal, choose a higher ratio or move closer safely. A close reading is often better.
Surface type also affects reliability. Shiny metal can reflect infrared energy and produce misleading results. Matte tape or a dull painted patch may provide a steadier reference, when suitable and safe. I once trusted a distant reading on a polished fitting. It looked precise, but the spot included nearby insulation. That shortcut was wrong. Compare readings from different distances, allow the thermometer to adjust to room conditions, and check the stated accuracy. A wide temperature range cannot fix poor targeting or an unsuitable surface.
Comparing Safety, Display, and Usability Features
Buying the best laser thermometer requires more than chasing the highest temperature range. Tip 1: Check the accuracy rating at your expected temperatures. Tip 2: Choose an adjustable emissivity setting for metal, paint, plastic, and glass. Tip 3: Confirm the distance-to-spot ratio. A small target needs a narrow measurement area. Tip 4: Look for a stable reading, not only a fast one. Shiny surfaces can produce misleading results.
Safety should remain practical and visible. Tip 5: Select a model with clear laser warnings and an easy-to-disable laser function. Tip 6: Keep the laser away from eyes, reflective surfaces, and moving vehicles. Tip 7: Check whether the thermometer stores maximum, minimum, or average readings. These records can reveal overheating that a single reading misses. Tip 8: Prefer a bright backlit display with large digits. I once used a dim screen near a furnace, and reading it required guessing. That was avoidable.
Usability often decides whether a tool gets used correctly. Tip 9: Test the grip with gloves, especially around cold rooms or hot equipment. Tip 10: Choose simple buttons that remain recognizable under pressure. A low-battery warning and automatic shutoff are useful details. Keep the sensor lens clean with a soft cloth. Even a good device can fail when dust covers the opening. Calibration guidance matters too, although manuals sometimes explain it poorly. Record comparison readings from a trusted reference when accuracy is important, and question results that seem unusually high or low.
10 Tips for Buying the Best Laser Thermometer? - Comparing Safety, Display, and Usability Features
| Tip | Feature to Compare | Recommended Specification or Data | Why It Matters | What to Check Before Buying |
|---|---|---|---|---|
| 1 | Measurement Range | Choose a range that matches the intended task. General household models commonly cover approximately -50°C to 500°C (-58°F to 932°F), while industrial models may measure considerably higher temperatures. | A thermometer cannot provide useful readings outside its specified operating range. Selecting an appropriate range helps prevent inaccurate measurements and unnecessary cost. | List the coldest and hottest surfaces you expect to measure, then compare them with the stated measurement range. |
| 2 | Accuracy | For many non-contact applications, a specification of approximately ±1.5°C or ±1.5% of the reading, whichever is greater, is a practical benchmark. | Accuracy determines how closely the displayed result represents the actual surface temperature. Performance may vary depending on distance, surface type, and ambient conditions. | Read the accuracy specification together with its stated test conditions and temperature range rather than relying only on the headline figure. |
| 3 | Laser Safety | Prefer a clearly identified low-power visible laser, typically Class 2, with safety labeling and instructions for avoiding direct eye exposure. | The laser is an aiming aid, not the temperature sensor. Proper classification and clear warnings reduce the risk of eye injury during use. | Look for the laser class, warning label, user instructions, and a trigger or menu option that allows the laser to be switched off. |
| 4 | Distance-to-Spot Ratio | A ratio of at least 12:1 is useful for many home and workshop tasks. Higher ratios are helpful when measuring small or difficult-to-reach targets from a distance. | The ratio describes how large the measured area becomes as the thermometer moves farther away. A small spot helps isolate the target and avoid nearby surfaces. | Confirm the stated ratio and calculate the spot size. For example, a 12:1 ratio produces an approximately 1 cm spot at 12 cm distance. |
| 5 | Emissivity Adjustment | An adjustable emissivity setting covering about 0.10 to 1.00 provides flexibility for different materials. Fixed-emissivity models are best for consistently matte surfaces. | Non-contact thermometers estimate temperature from infrared energy. Shiny, reflective, or low-emissivity surfaces can cause significant errors if the setting is unsuitable. | Verify that the emissivity can be adjusted and review the manual for recommended settings for metals, painted surfaces, plastics, and other materials. |
| 6 | Display Readability | Choose a high-contrast digital display with backlighting, clear unit selection between °C and °F, and easily readable digits. | A readable display improves accuracy during quick inspections, low-light work, and measurements taken at awkward angles. | Check the digit size, backlight control, viewing angle, unit conversion, and whether the screen shows warning symbols clearly. |
| 7 | Response Time and Functions | A response time of approximately 500 milliseconds or less is convenient. Useful functions include hold, minimum, maximum, average, and temperature difference. | Fast response and data functions make it easier to scan several points and identify unusual temperature changes without repeatedly recording readings by hand. | Confirm which functions are included, how they are activated, and whether the reading remains visible after the trigger is released. |
| 8 | Operating Environment and Protection | For ordinary indoor use, an operating temperature of roughly 0°C to 40°C is common. Dust- or water-resistant construction is useful for workshops and outdoor tasks. | Ambient temperature, humidity, dust, and moisture can affect reliability and may damage a device that is not designed for the working environment. | Review the operating and storage temperature limits and look for a stated ingress-protection rating when exposure to dust or water is expected. |
| 9 | Power and Ergonomics | A common replaceable battery should provide several hours of active use or many measurement sessions. An automatic shut-off feature helps conserve power. | Comfortable handling and dependable battery life reduce interruptions, especially during repeated inspections or work in difficult positions. | Check battery type, estimated operating time, automatic shut-off period, grip design, trigger placement, and overall weight. |
| 10 | Calibration and Intended Use | Choose a model with documented calibration guidance, a stated warranty, and specifications suited to the application. Do not use an infrared thermometer for medical, food-safety, or electrical work unless it is specifically designed and approved for that purpose. | Calibration support helps maintain confidence in measurements. Different applications may require specialized accuracy, hygiene features, electrical ratings, or regulatory compliance. | Review the calibration interval, included documentation, warranty terms, application limitations, and any required safety or compliance markings. |
Testing Reliability, Battery Life, and Overall Value
A reliable laser thermometer starts with measurement discipline, not a flashy temperature range. Check calibration records and prefer testing under ISO/IEC 17025 laboratory procedures. NIST infrared thermometry guidance identifies emissivity and reflected radiation as major uncertainty sources. Choose adjustable emissivity, often near 0.95 for matte surfaces. Keep the sensor perpendicular. Hold the stated distance-to-spot ratio. Test readings against a stable reference surface. ASTM E2758 emphasizes target size, distance, and environmental control during infrared evaluation. That detail is easy to ignore.
Battery claims deserve skepticism. IEC 60086-1 evaluates primary cells under defined discharge conditions, not every thermometer’s real workload. Compare operating hours, standby drain, auto-shutoff, and cold-weather behavior. A practical test uses repeated readings, backlight use, and the laser enabled. Record voltage before and after a 30-minute session. Replaceable batteries may cost less over three years. Rechargeable designs reduce waste, but charging downtime can interrupt field work. Look for clear low-battery warnings. One missed warning can corrupt a maintenance log.
Overall value means repeatable readings, readable controls, and documented support. NIST guidance treats traceability as a chain of comparisons to reference standards. Ask whether certificates include dates, conditions, and measurement uncertainty. Avoid paying for extreme ranges you never measure. A modest thermometer with stable accuracy can beat a powerful model with vague specifications. My own weak point is trusting first-use accuracy too quickly. Heat, dust, and shiny metal expose that mistake. Check warranty length, recalibration access, and replacement battery pricing before purchase.
